Your nails feel paper-thin, bendy, and sore after removing acrylics. Here’s exactly how to heal them — week by week — with science-backed steps and honest product advice.
Removing acrylics often leaves nails thin, white, and damaged — but this is completely reversible. With the right routine, most people see strong, healthy natural nails return within 8–12 weeks. This guide gives you the exact steps, ingredients, and timeline to make that happen as fast as possible.
- Acrylic removal strips the nail’s top protective layers, causing the thinness and peeling you’re seeing — this is reversible.
- The fastest recovery combines daily hydration, a nail strengthener, and a real break from all enhancements.
- Biotin, keratin-rich foods, and cuticle oil are your three most powerful natural allies.
- Full recovery takes 8–12 weeks for most people if you follow a consistent routine.
- The single worst thing you can do: reapply acrylics or gel too soon, or aggressively file damaged nails.
Why Acrylics Damage Your Nails
To understand how to strengthen damaged nails after acrylics, it helps to know what actually happened beneath the surface. Acrylics bond to your natural nail using a chemical primer and an etching process that physically roughens the nail plate. When the acrylic is removed — especially if it is pried off, filed aggressively, or soaked incorrectly — layers of the natural nail come off with it.
The result is a nail plate that is thinner than normal, dehydrated, and structurally weakened. You may notice:
- White spots or a chalky appearance (keratin damage)
- Nails that bend or flex easily at the tips
- Peeling in horizontal layers
- Sensitivity or soreness when pressing on the nail
- Ridges running along the length of the nail
The good news: nails grow approximately 3mm per month. Damaged cells at the base will be completely replaced within 3–6 months even without intervention. With the right care, you dramatically improve how well the new growth comes in — and how quickly the old damage grows out.
Step-by-Step Nail Recovery After Acrylics
Stop all enhancements — give nails a true break
The single most important step in nail recovery after acrylics is also the hardest: no acrylics, no gel polish, no dip powder, and no press-ons for at least 6–8 weeks. Putting new enhancements on damaged nails traps the damage underneath and prolongs the recovery cycle.
If you absolutely need colour, use a breathable 5-free nail polish and remove it with an acetone-free remover. But ideally, let your nails breathe completely during the initial recovery phase.
Hydrate aggressively — nails and cuticles
Dehydration is the primary driver of post-acrylic damage. The nail plate is made of flattened keratin cells held together by a lipid-water matrix — and acrylic chemicals strip that moisture away. Replenishing it consistently is non-negotiable.
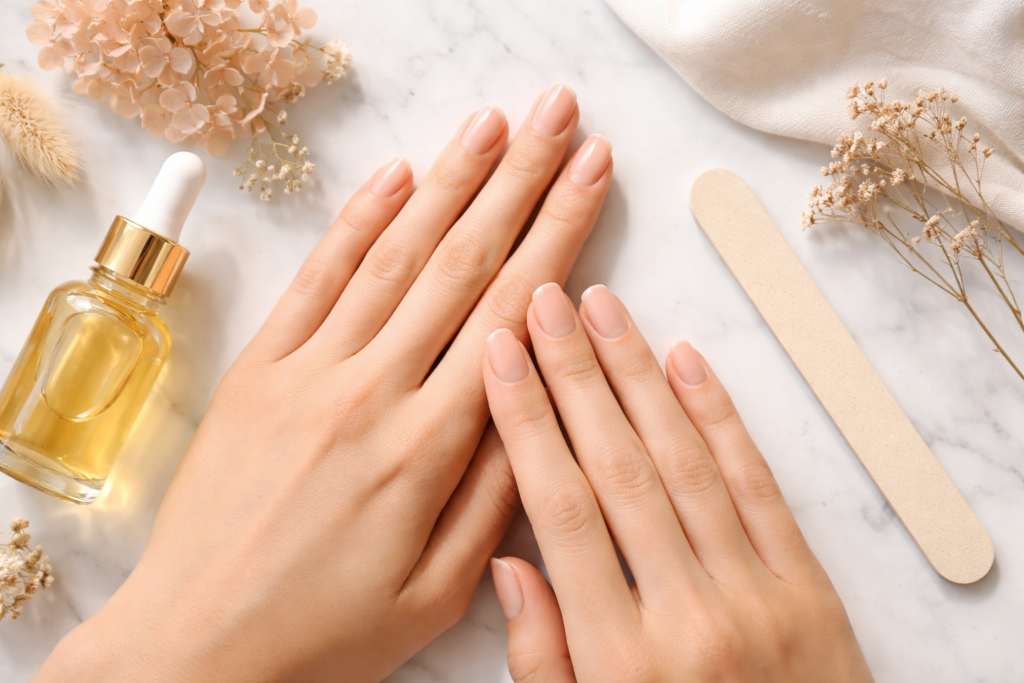
- Apply cuticle oil at least twice daily — morning and before bed
- Choose oils containing jojoba, vitamin E, or argan — they penetrate the nail plate rather than just sitting on the surface
- Massage the oil into the cuticle and nail plate for 60 seconds per application
- Wear gloves when washing dishes or using cleaning products
- Avoid long hot baths — water causes nails to expand and contract, worsening peeling
Use a nail strengthener — strategically
A good nail hardener can significantly accelerate nail repair after acrylics — but only when used correctly. Many people over-apply strengtheners, leading to nails that become rigid and snap. The goal is structural support, not concrete.
- Apply a keratin-based or calcium-based strengthener every 2–3 days
- Take one week off every month to prevent over-hardening and brittleness
- Avoid formaldehyde-based hardeners on severely thinned nails — too harsh for early recovery
- Best timing: apply right after a shower when nails are slightly softened and more receptive
Keep nails short and file correctly
Long damaged nails will snap before they can grow out healthy. Keep them trimmed to a short oval or squoval shape to reduce stress on the free edge. Use a fine-grit file (180–240 grit) only — never a coarse acrylic file on natural nails.
- Always file in one direction only — sawing back and forth creates microfractures
- After filing, seal the edge with a layer of strengthener or base coat
- Do not cut cuticles — push them back gently with a rubber pusher after a warm soak
- Avoid buffing the nail plate surface for the first 4 weeks of recovery
Support nail growth from the inside
No topical product can outperform what you give your body. Nail keratin is a protein, and its production depends on specific nutrients often depleted by stress or poor diet. The most evidence-backed nutrients for nail recovery are:
- Biotin (2.5mg/day) — directly supports keratin infrastructure; effective after at least 6 weeks consistent use
- Collagen peptides — improve nail plate flexibility and reduce breakage frequency
- Zinc — one of the most common overlooked causes of soft, ridged nails
- Iron — frequently linked to brittle, spoon-shaped nails, particularly in women
- Protein-rich foods — eggs, lentils, salmon, Greek yoghurt, chicken
Best Ingredients to Look For
When choosing products to strengthen nails after acrylics naturally, these are the ingredients that have real evidence behind them:
Your Week-by-Week Recovery Timeline
Here is a realistic timeline for what to expect during your nail recovery journey after acrylics. Everyone’s pace is slightly different, but this is the general pattern:
5 Mistakes That Slow Down Nail Recovery
These are the most common errors people make when trying to heal damaged nails after acrylics — and the ones most likely to add weeks to your recovery timeline.
1. Reapplying enhancements too soon
Putting new acrylics or gel on damaged nails traps the damage and restarts the chemical stress cycle on a nail plate that hasn’t had time to rebuild. Six to eight weeks minimum is not optional — it is the biological requirement for meaningful plate regeneration.
2. Using acetone too frequently
Acetone is necessary to remove gel and acrylics, but using it repeatedly on already-damaged nails strips away the lipid layer that locks moisture into the plate. Switch to an acetone-free remover for any regular polish changes during recovery.
3. Neglecting cuticle care
The cuticle is the protective seal at the base of the nail. When it dries out and cracks, bacteria and environmental stressors reach the nail matrix — the living tissue that produces new nail growth. Healthy cuticles directly produce healthier, stronger nails.
4. Buffing damaged nails to hide the chalky look
The white, dull appearance is frustrating, but buffing removes even more of an already-thin nail plate. Avoid all buffing for the first four weeks of recovery. The appearance improves on its own as hydration is restored and new nail grows in.
5. Expecting results in days
Nails grow slowly. Products can optimise and protect the growth process, but they cannot override biology. Consistency over 8–12 weeks beats any single product or quick fix. Progress is real — it is just measured in weeks, not days.
Frequently Asked Questions
Most people see significant improvement within 6–8 weeks, with full recovery by 12 weeks. Nails grow approximately 3mm per month, so the timeline depends on how much damaged nail needs to grow out. Severe damage may take 4–6 months for complete recovery.
The most effective at-home combination is: daily cuticle oil (jojoba or argan-based), a keratin or calcium nail strengthener every 2–3 days, a daily biotin supplement, and protective gloves for housework. This addresses both the surface damage and the internal nutrition needed for healthy new nail growth.
It is best to avoid gel polish for at least 6–8 weeks. The UV curing process and acetone removal are both stressful on a compromised nail plate. If you need colour, use a regular 5-free nail polish with an acetone-free remover to minimise further damage.
Yes, with important caveats. Biotin is water-soluble and requires consistent supplementation — typically 2.5mg per day for at least 6 weeks — before results become noticeable. It is most effective if you have a biotin deficiency. Combined with a protein-rich diet, most people report meaningful improvement after 6–8 weeks.
Peeling in horizontal layers (onychoschizia) is a classic sign of dehydration and chemical damage at the nail plate level. Increase cuticle oil frequency, reduce water exposure by wearing gloves, and use a protein-based strengthener. Never peel the layers off manually — use small scissors or a file to remove them cleanly.
Short-term press-ons are significantly gentler than acrylics or gel when applied with adhesive tabs rather than nail glue. Worn for 1–3 days at a time, they are a much safer option for adding length or colour during recovery than any traditional enhancement.
Nail keratin is a protein, so protein-rich foods are the foundation: eggs, salmon, chicken, lentils, and Greek yoghurt. Zinc-rich foods (pumpkin seeds, cashews, chickpeas) and iron-rich foods (spinach, red meat, fortified cereals) address the two most common nutrient deficiencies linked to brittle and slow-growing nails.
The most natural route: daily jojoba or argan cuticle oil, a diet rich in biotin and protein, no harsh chemicals near the nails, and keeping them trimmed short while they regrow. Avoid hardeners with formaldehyde — keratin and calcium-based alternatives are effective and gentler.