So you finally said goodbye to your gel or acrylic set — and now you’re staring at your hands thinking… what happened?
Peeling layers. Paper-thin tips. Nails that snap before they even reach the edge of your finger. Sound familiar? Don’t worry — you’re not alone, and your nails will recover. It just takes the right routine and a little patience.
That’s exactly what this guide is for. Let’s get into it.
Why Do Nails Get Damaged After Gel or Acrylics?
Every time gel or acrylics are applied, your natural nail gets filed down to create grip. Over time, this thins out the nail plate — the hard, protective layer made of keratin. Then comes removal: whether it’s soaking in acetone or buffing off, both strip away moisture and weaken the nail structure.
The result? Nails that feel chalky, bendy, or so thin they hurt to the touch.
The important thing to know is: your nails can’t “heal” the way skin does. The damaged part has to physically grow out. What you can do is protect the new growth coming in and make sure it comes in as strong as possible. If you want to understand this process in depth, our guide on the ultimate keratin recovery guide breaks down exactly what happens at a cellular level.
How Long Does Nail Recovery Actually Take?
Here’s an honest timeline — because nobody likes surprises:
- Weeks 1–2: The roughest stage. Nails feel paper-thin and look their worst. Stay consistent even if you don’t see results yet.
- Weeks 3–4: New growth appears at the base. Texture starts to improve noticeably.
- Weeks 5–8: Noticeable improvement in strength and flexibility.
- Months 3–6: Full recovery — healthy nail has completely grown in.
Nails grow about 3mm per month, so if damage runs halfway down the nail bed, you’re realistically looking at 2–3 months minimum. The key is: don’t rush it, and don’t cover it up with another set.
Step-by-Step Nail Recovery Routine
Step 1: Give Your Nails a Real Break
This one’s non-negotiable. Skip the gels, acrylics, and dip powders for at least 6–8 weeks — ideally 3 months if the damage is significant. If bare nails feel uncomfortable, a clear strengthening base coat is fine as a light protective layer. Just avoid anything with formaldehyde — it can make nails too rigid, causing them to snap rather than flex.
Step 2: Trim Them Short and File Gently
Yes, even if you love length. Short nails during recovery are your best friend — they’re less likely to catch, snag, or break further down into the nail bed. File gently in one direction only using a glass nail file, which is far kinder on damaged nails than emery boards.
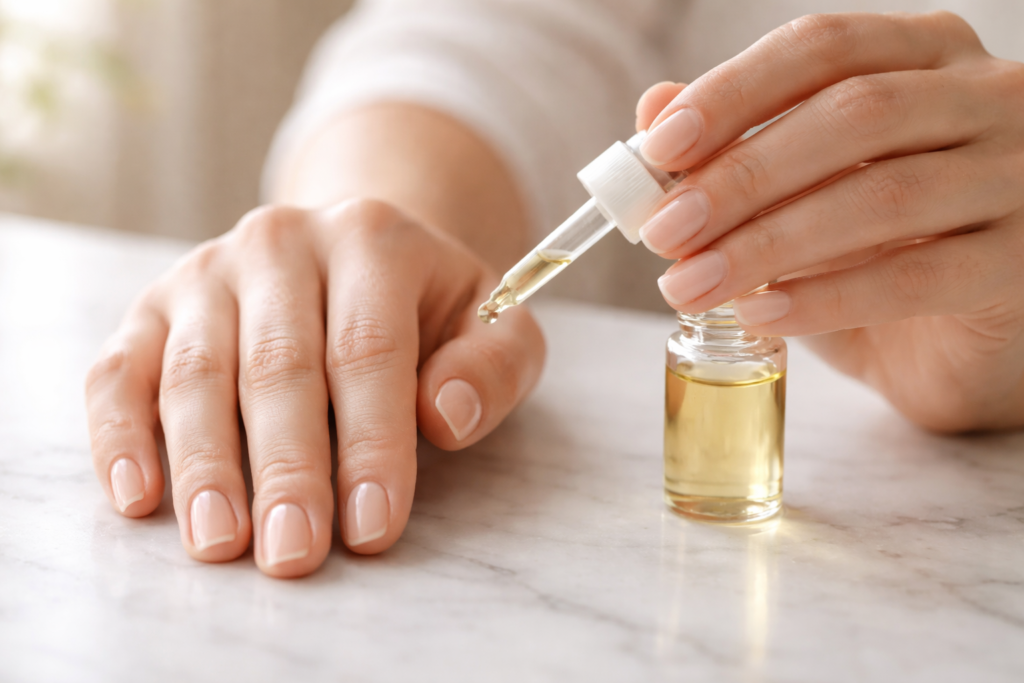
Step 3: Hydrate, Hydrate, Hydrate
Gel and acrylics seriously dehydrate the nail plate. Restoring that moisture is the single most important thing you can do right now. Apply cuticle oil at least 3 times a day — morning, evening, and whenever you remember in between. Look for oils with jojoba, Vitamin E, or sweet almond oil. Our full breakdown of the best cuticle care routine for post-salon recovery walks you through exactly how to apply it for maximum effect.
💡 Pro tip: Try “nail slugging” before bed. Apply cuticle oil generously, seal it in with a thick balm like Aquaphor, pop on cotton gloves, and sleep. You’ll wake up with noticeably more flexible, hydrated nails.
Step 4: Use a Nail Strengthener — the Right Way
A good strengthener can protect fragile nails while new growth comes in. But not all of them are created equal. Avoid anything with formaldehyde or toluene — these make nails temporarily harder but more prone to cracking long term. Look for 10-free formulas, biotin or keratin-infused treatments, and breathable options. Apply 2–3 times per week, not daily — overuse can backfire. For a full tested comparison, check out our post on the best nail strengtheners for weak nails with a 30-day repair guide.
Step 5: Protect Nails from Water
Water is one of the biggest enemies of recovering nails. Constant wetting and drying causes nails to expand and contract, which speeds up splitting and peeling. Always wear rubber gloves when washing dishes, cleaning, or using household chemicals.
Step 6: Feed Your Nails From the Inside
What you eat genuinely affects how your nails grow back. Focus on biotin (Vitamin B7), collagen peptides, protein, zinc, and omega-3s. If you want to go deeper on this, our article on the best vitamins for nail growth and repairing damaged nails covers exactly what to look for and what actually works.
Real Talk: What I Noticed During Recovery
One thing I noticed when I stopped using gels cold turkey was how thin my natural nails actually were. They felt like paper. It’s easy to get discouraged in that first week. However, the turning point usually happens around day 20. That’s when the new, healthy growth at the base starts to feel significantly sturdier than the damaged tips. It’s not an overnight miracle, but seeing that clear line of healthy growth is incredibly satisfying.
What Nail Polish Can I Wear During Recovery?
You don’t have to go completely bare. In fact, a non-toxic polish can act as a protective layer for fragile nails. The key is choosing formulas that won’t make the damage worse. Avoid anything with harsh solvents or formaldehyde — and always use an acetone-free remover. We’ve rounded up the best non-toxic nail polish brands for damaged nails if you want colour without compromising recovery.
If you prefer a vegan approach, we also have a dedicated guide to the 10 best vegan nail polish brands for damaged nails — all tested and honestly reviewed.
What to Avoid During Recovery
- ❌ Picking or peeling any remaining gel — this strips entire keratin layers off
- ❌ Using your nails as tools (opening cans, scratching stickers)
- ❌ Acetone-based removers — switch to acetone-free versions
- ❌ Over-buffing — this thins the nail plate further
- ❌ Jumping straight back into a new gel or acrylic set
Want to Speed Things Up?
If you’re also trying to grow your nails back to a good length as part of recovery, we’ve put together a practical guide on 6 steps to grow nails faster naturally — a great companion read once you’ve stabilised the damage and are in the growth phase.
And if thin nails are your main concern, our deep dive into thin nail treatment and restoring natural strength gives you a more targeted approach specifically for that issue.
When Should You See a Dermatologist?
Most nail damage heals with consistent at-home care. But visit a professional if you notice yellow or green discolouration (possible fungal infection), pain or bleeding that doesn’t resolve, nails separating from the nail bed, or no real improvement after 4–6 weeks of consistent care. These can be signs of something that needs proper treatment beyond surface-level recovery.
Final Thoughts
Recovering your nails after gel or acrylics isn’t instant — but it is absolutely possible. Cut them short, keep the cuticle oil flowing, use a gentle strengthener, protect them from water, and feed your body the right nutrients. Give it 8–12 weeks and you’ll be amazed at the difference.
Your natural nails are worth the wait. ✨